Excel မှာ Print ထုတ်ရင် Table ပျောက်တဲ့ ပြဿနာ ဖြေရှင်းနည်း။ 🧠
1️⃣. Print Area သတ်မှတ်ခြင်း 📐
- အဆင့် ၁: Table ကို Select လုပ်ပါ။
- အဆင့် ၂: Page Layout Tab > Print Area > Set Print Area ကိုနှိပ်ပါ။
- အဆင့် ၃: Print Preview ကြည့်ပါ။
2️⃣. Page Setup ချိန်ညှိခြင်း ⚙️
- အဆင့် ၁: Page Layout Tab > Page Setup ကိုနှိပ်ပါ။
- အဆင့် ၂: Page Tab မှာ:
- Orientation: Portrait/Landscape ပြောင်းကြည့်ပါ။
- Scaling: Fit to 1 page(s) wide by 1 tall လုပ်ပါ
- အဆင့် ၃: Margins Tab မှာ Margins ချိန်ညှိပါ
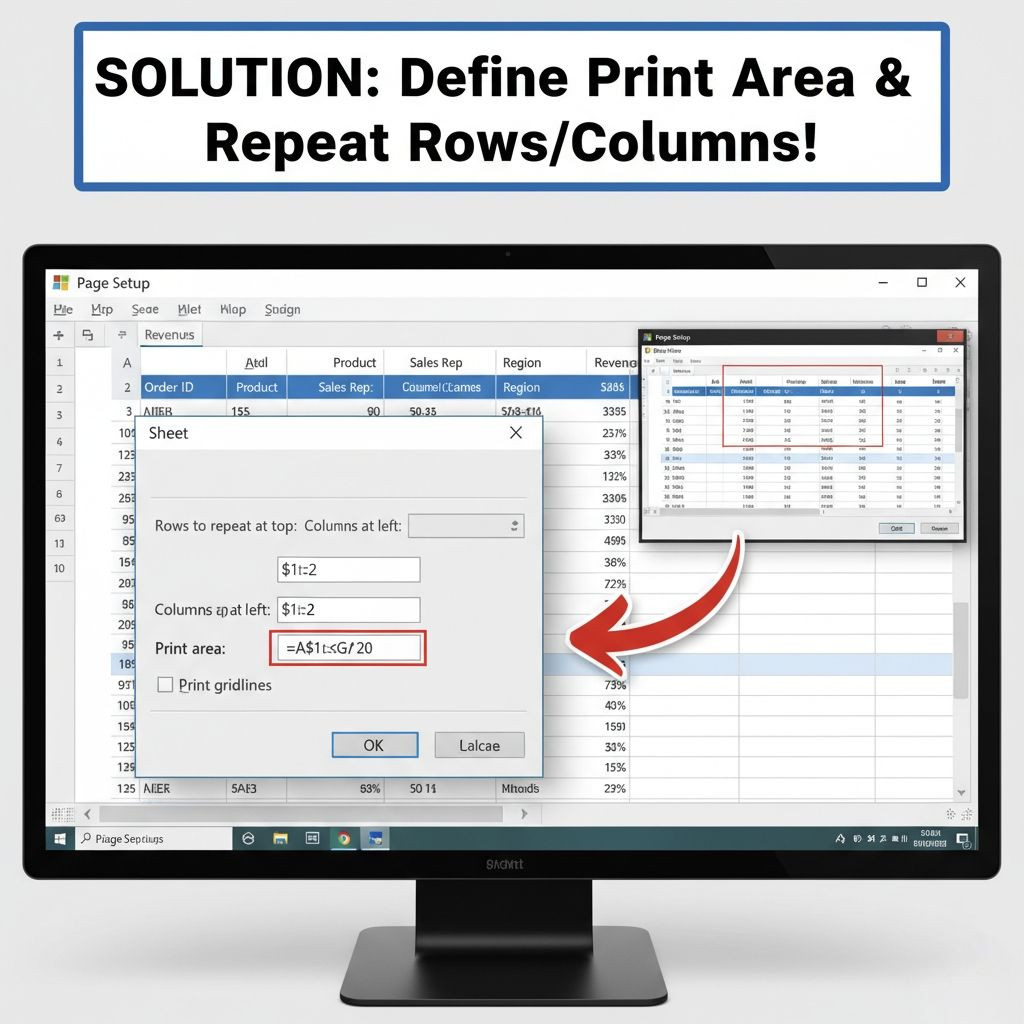
- အဆင့် ၄: Sheet Tab မှာ:
- Print Titles မှာ Rows to repeat at top သတ်မှတ်ပါ
- Gridlines နဲ့ Row and column headings ကို Check လုပ်ပါ ✔️
3️⃣. Print Titles သတ်မှတ်ခြင်း 📏
- အဆင့် ၁: Page Layout > Print Titles
- အဆင့် ၂: "Rows to repeat at top" မှာ Table Header Row ကိုရွေးပါ
- အဆင့် ၃: "Columns to repeat at left" မှာ လိုအပ်ရင် Column ရွေးပါ
4️⃣. Table Style ပြန်ချိန်ညှိခြင်း
- အဆင့် ၁: Table ကိုနှိပ်ပါ
- အဆင့် ၂: Table Design Tab > Table Style Options
- အဆင့် ၃: Header Row, Banded Rows, First Column တို့ကို Check လုပ်ပါ
5️⃣. Cell Borders ပြန်သတ်မှတ်ခြင်း
- အဆင့် ၁: Table ကို Select လုပ်ပါ
- အဆင့် ၂: Home Tab > Borders > All Borders ရွေးပါ
- အဆင့် ၃: Line Style နဲ့ Line Color ပြောင်းကြည့်ပါ
6️⃣. Print Preview မှာ စစ်ဆေးခြင်း
- အဆင့် ၁: File > Print (Ctrl+P)
- အဆင့် ၂: Settings မှာ:
- Print Active Sheets ရွေးပါ
- Page Orientation ပြောင်းကြည့်ပါ
- Page Margins ချိန်ညှိပါ
7️⃣. Page Break Preview သုံးခြင်း
- အဆင့် ၁: View Tab > Page Break Preview
- အဆင့် ၂: Blue Lines ကိုဆွဲပြီး Table ပြည့်ဝအောင် ချိန်ညှိပါ
8️⃣. Alternative Solution
Table Format မသုံးဘဲ Normal Range အဖြစ်ပြောင်းပါ:
- အဆင့် ၁: Table ကိုနှိပ်ပါ
- အဆင့် ၂: Table Design > Convert to Range
- အဆင့် ၃: Borders ပြန်သတ်မှတ်ပါ
ဒီနည်းလမ်းတွေထဲက တစ်ခုခုက Table Print ထုတ်ရင် ပျောက်တဲ့ ပြဿနာကို ဖြေရှင်းပေးနိုင်ပါလိမ့်မယ်။
ဒီပိုစ့်က မိတ်ဆွေအတွက် အကျိုးရှိတယ်ဆိုရင် Share & Follow လေး နှိပ်ပေးသွားပါဦး ခင်ဗျာ။
𝑪𝒐𝒎𝒑𝒖𝒕𝒆𝒓 𝑶𝒏𝒍𝒊𝒏𝒆 𝑻𝒓𝒂𝒊𝒏𝒊𝒏𝒈